How to Add a New Home Owner
When a property changes ownership we create a new user account for the new home owner and then delete the old user. It is possible to create a new user via the WordPress (WP) backend interface, but it is better to use the custom form on the front end to ensure we get all the required extra info entered (like lot number!).
Notes about users:
- Username must be unique, and are public.
- Please create multiple accounts for one property when multiple people/owners want to be subscribed to notices and the newsletter.
Steps to Add Home Owner
- Go to https://saundersmeadow.com/register/. This page is password private (admins/board members only).
- Enter all the information in the form. For the username please _always_ create the username for the primary user as LastName.LotNo. For example Brown.31. This format is very important so that it’s easy to find all the users later that need to be deleted when a property is sold. If you are creating a secondary account that would use the same last name please use FirstInitial.LastName.LotNo. For example L.Brown.31.
- Once submitted the new member will get an email to confirm their account. An admin can also manually confirm the account, but this is a good step to make sure they have actually received it.
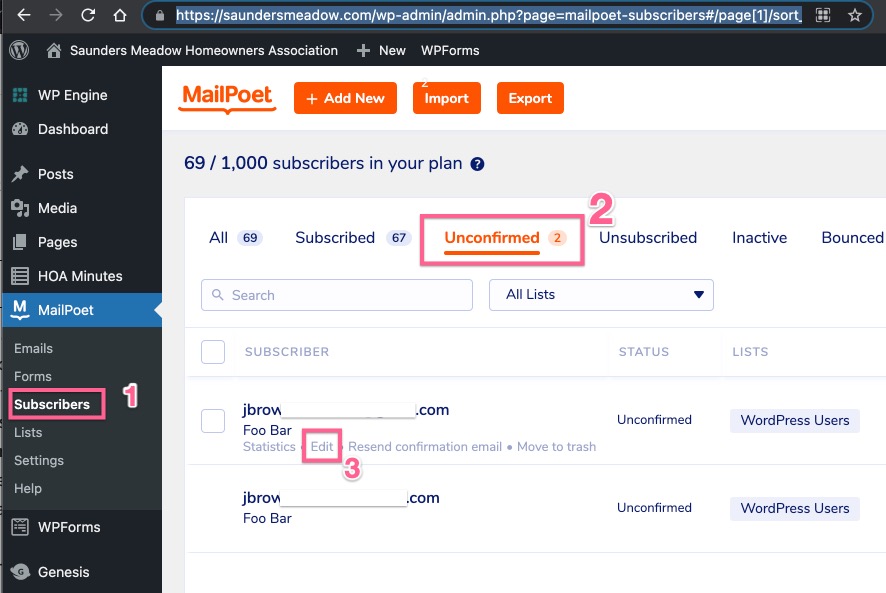
- We send newsletters to “all WP users” which will automatically pick up this new user, but they won’t automatically be a confirmed subscriber. Therefore you have into the backend to MailPoet:Subscribers:Unconfirmed (1-2), click edit (3) for the new user.
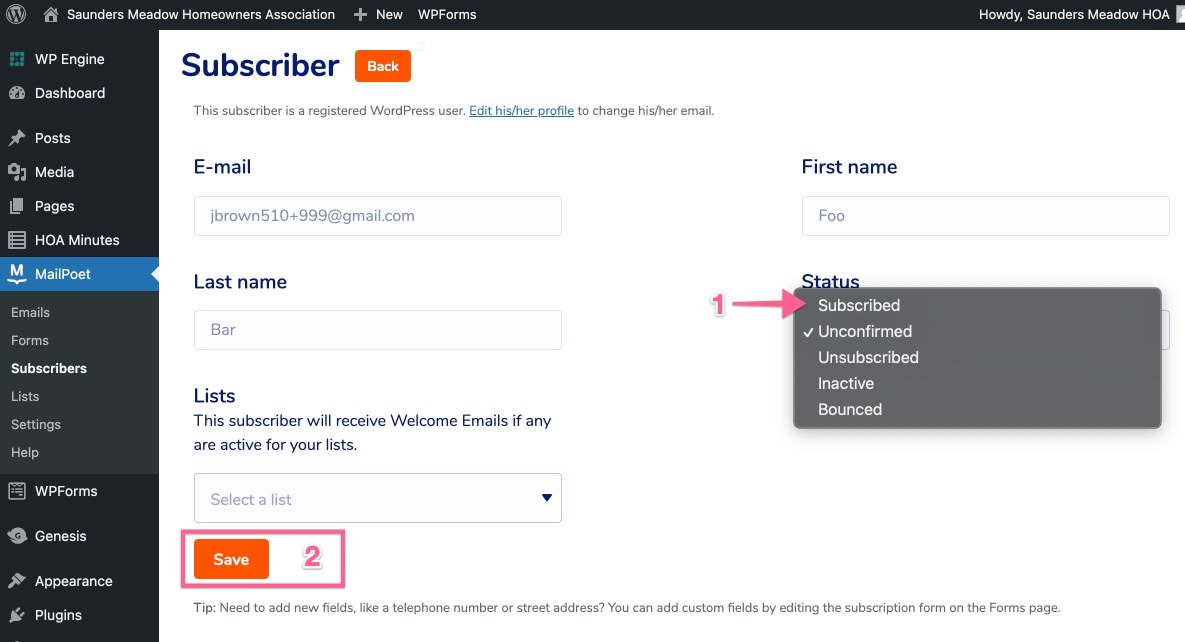
- Change their subscription status from “Unconfirmed” to “Subscribed” (1) and click Save (2).
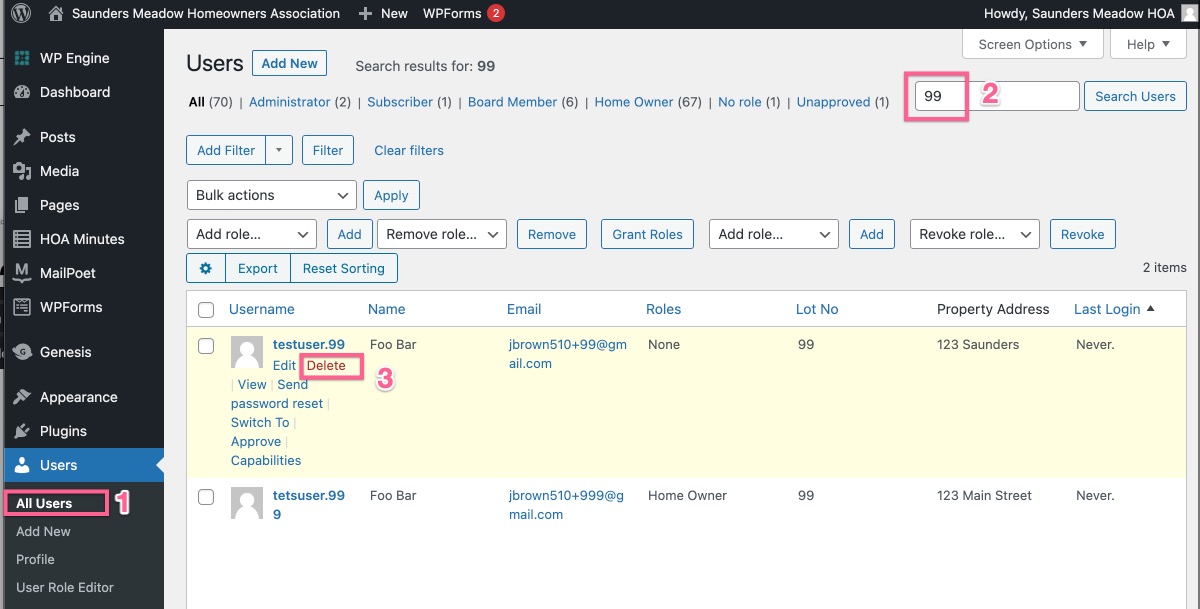
- Delete the previous home owner(s) by going to the the Users:All Users page (1), searching for them by lot number (2), and then clicking the delete link (3) below their name.
- That’s it! Repeat if adding more than one user.
How to Make a Home Owner a Board Member
Home Owners on the website get the role and permissions of “Home Owner”, which means they can view protected content (member roster and minutes) as well as subscribe to the newsletter. Home Owners however can not edit content on the website. Board Members get the role and permissions of “Board Member” which is elevated and grants the ability to edit content and user on the website.
Steps to Make Home Owner a Board Member
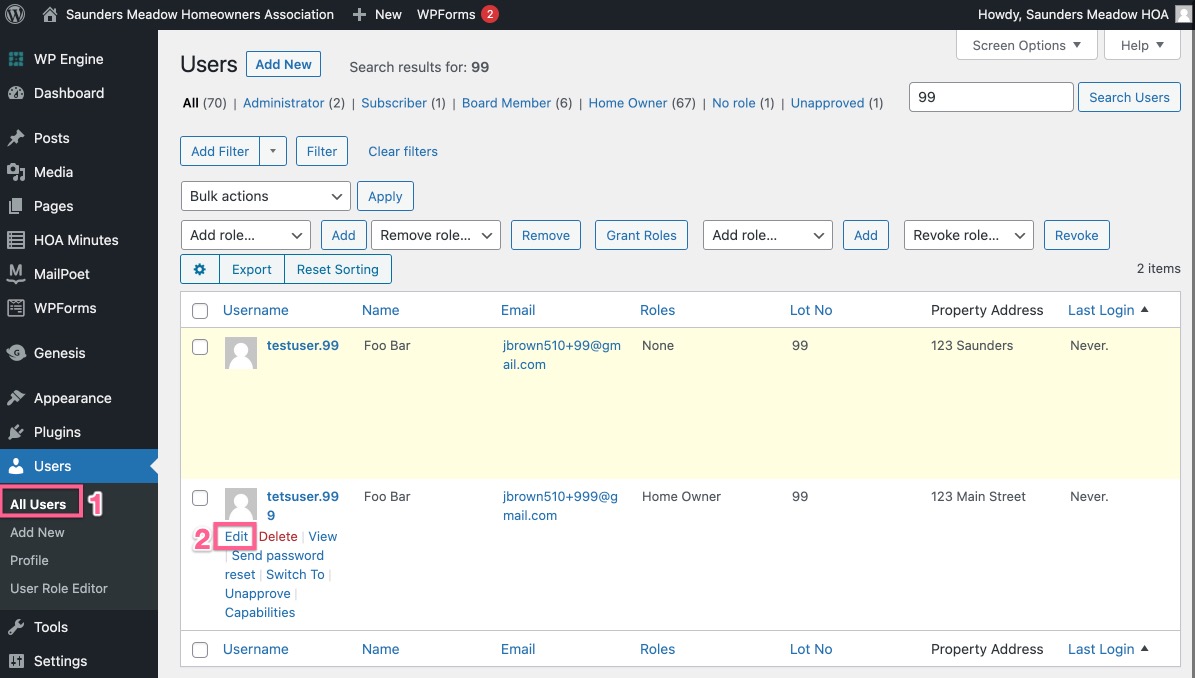
- Navigate to Users:All Users (1) on the backend of the website and then locate the user that needs to their permissions elevated and click edit (2) below their name
- Scroll down and find the Roles section of checkbox. Check the box for “Board Member” (1) then scroll back to the top and save changes by clicking the “Update User” button (2).
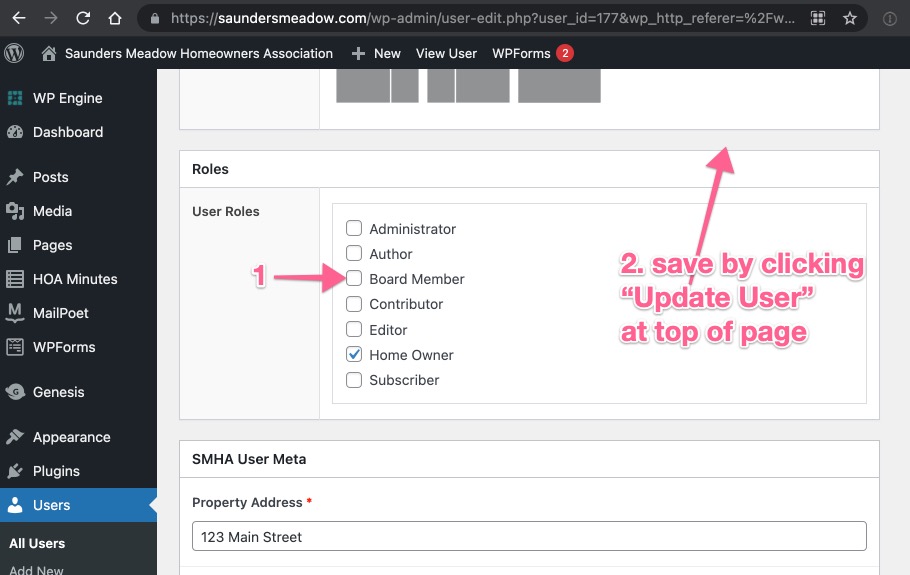
- Find the exiting board members and repeat the steps, only unchecking the “Board Member” box. Note do not uncheck the Home Owner check box.
- That’s it.
How to Add Posts, Agendas or Announcements
Posts, Agendas and Announcements are standard “blog posts” and get created by adding a Post. The easiest way to do this is to clone an existing post of the same type.
Steps to make Posts, Agendas and Announcements
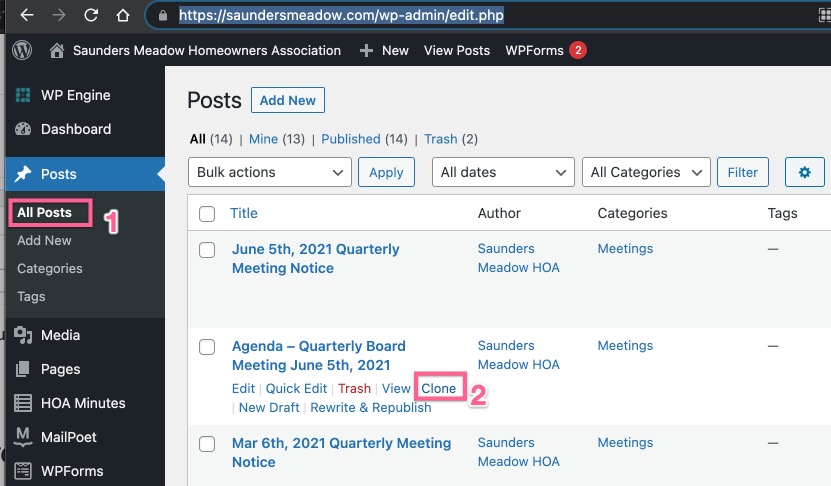
- Navigate to Posts:All Posts (1) and below and existing post click “Clone” (2)
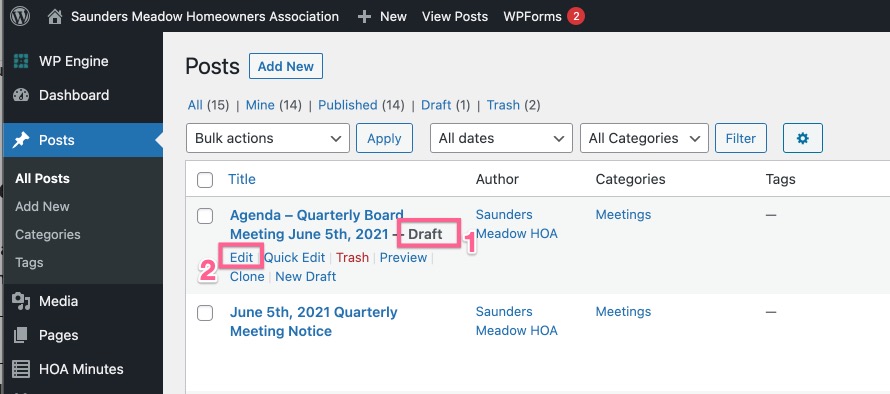
- A new draft (1) post will appear at the top of the list. Click edit (2) below this new draft post
- Edit the new post and when done editing click the Publish button. For further instructions on editing content in WordPress there are video tutorials installed on the site you can watch.
How to Add Meetings Minutes
Meeting minutes are a special post type because they are private and not visible to the public. While creating meeting minutes is very similar to Posts, Agendas, and Announcements it is very important they are created in the minutes section to keep them private.
Steps to make Meeting Minutes
- Navigate to HOA Minutes:HOA Minutes (1) and below and existing post click “Clone” (2). You can also click “Add New” if you prefer to start from scratch.
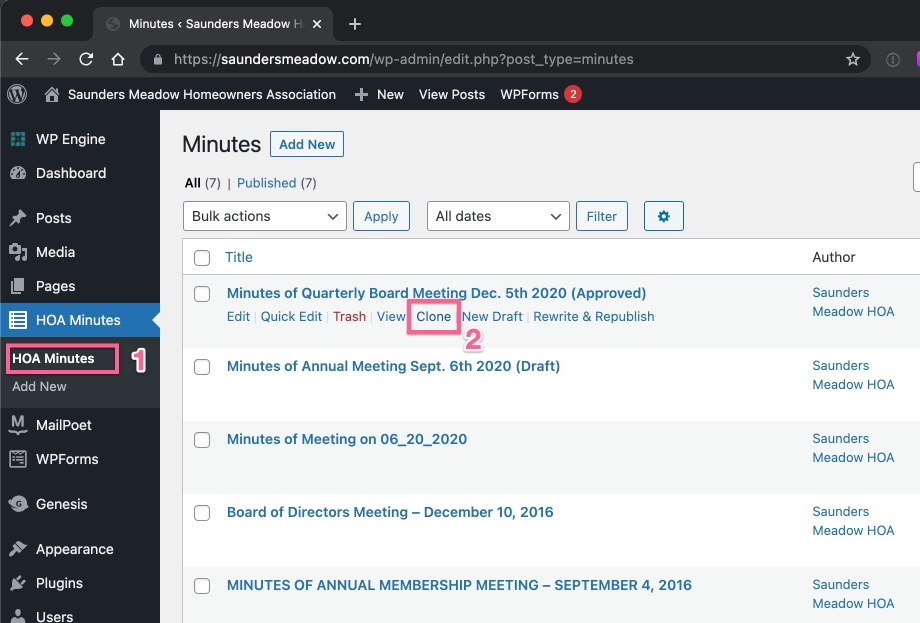
- A new draft (1) post will appear at the top of the list. Click edit (2) below this new draft post
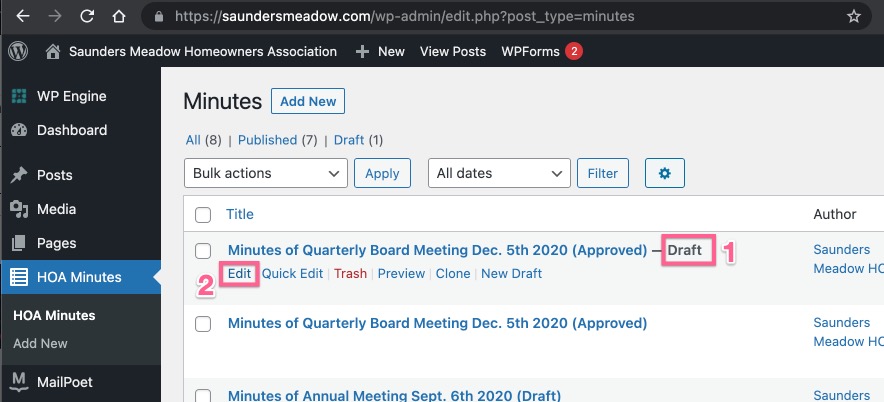
- Edit the new Minutes Post title and content.
- Be sure to edit the title to reflect (draft) or (approved). When the minutes do become approved after the next meeting, the post gets edited if necessary and the title changed from (draft) to (approved). Do not create a brand new post for approved minutes, just edit the existing one.
- When done creating/editing click the Publish button in the top right corner.
- For further instructions on editing content in WordPress there are video tutorials installed on the site you can watch.
- That’s it
How to Send a Newsletter
Newsletters again are a special post type different from the others. They do not get published to the website and ONLY get emailed out. If you wish for the email content to also get published to the website recreate it and follow the steps for Posts above.
Steps to send a Newsletter
- Navigate to MailPost:Emails (1) and below and existing post click “Duplicate” (2).
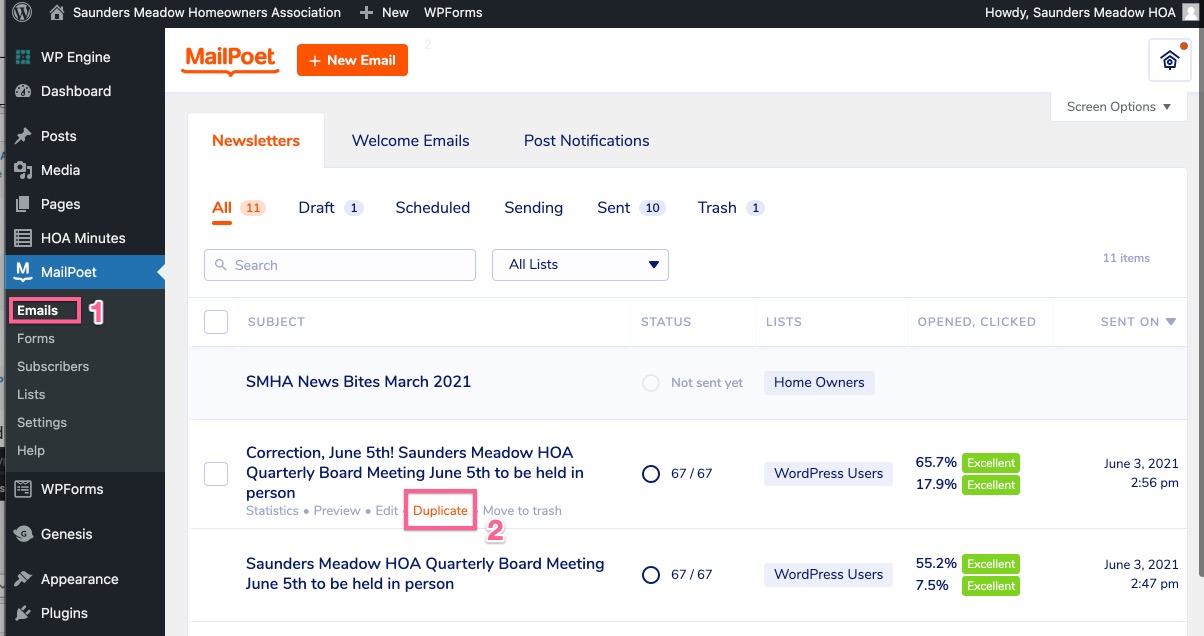
- A new copy (1) newsletter will appear at the top of the list, it’s title will start “Copy of”. Click edit (2) below this new draft newsletter
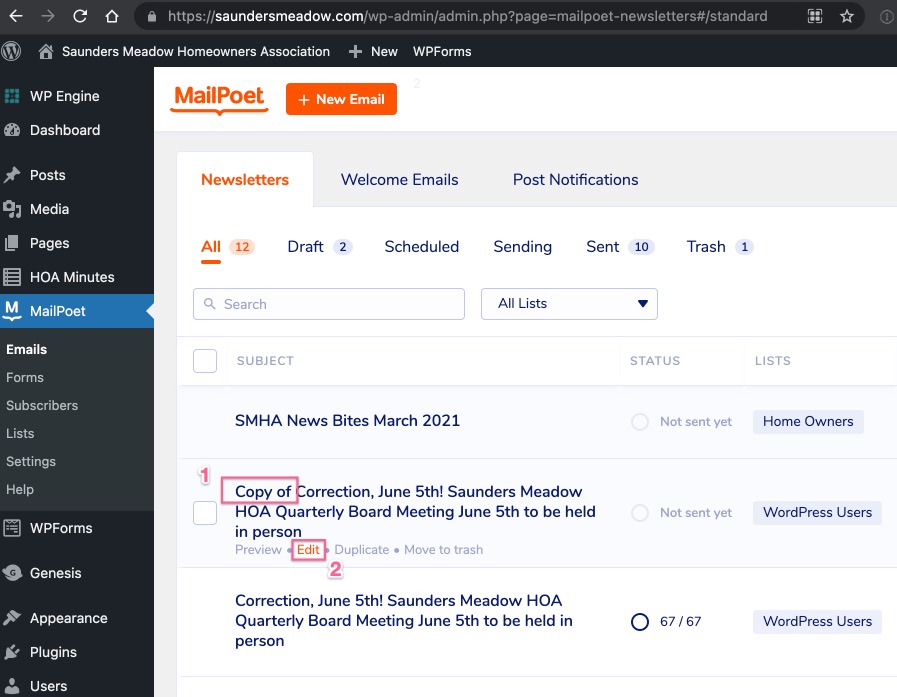
- Newsletters use a different editor than other types of posts. This allows for inserting things like names into templates, as well as formatting that works for email. Edit content as needed. When done, click save and/or next in the top right corner.
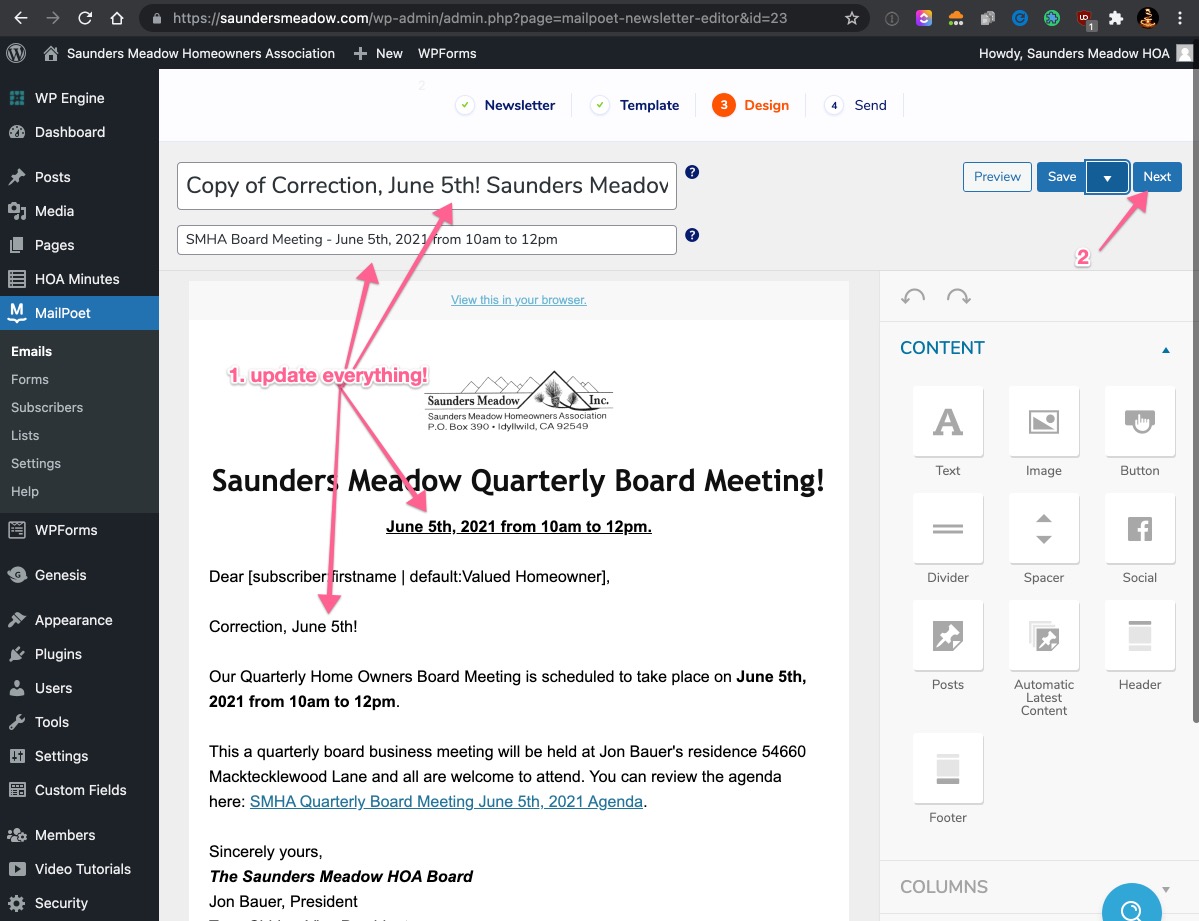
- When you’re ready to send, click send, or schedule it for a future date if that seem appropriate. When you hit send, it’ll immediately start emailing, and be done in a few minutes so be sure it’s ready to actually send.

- That’s it. Bonus you can go back to the screen in the first step and click statistics to see which emails have been opened, bounced, etc.